Product Description
No time wasted with
the Fixturlaser GO Pro
An Adaptive User Interface with the VertiZontal Moves
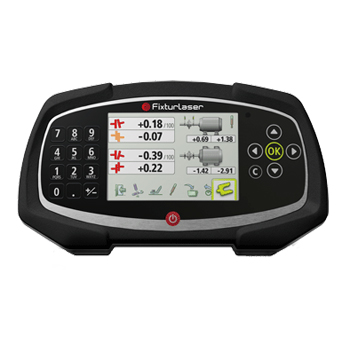
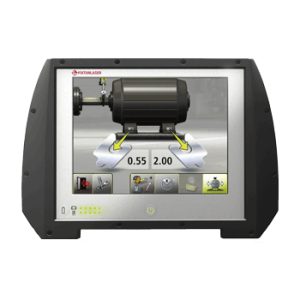
Fixturlaser has developed an adaptive user interface, i.e. a user interface that actually tells you what to do based on your measurement results. With the VertiZontal Moves feature, we have brought to you one of the most innovative and time saving features in the shaft alignment world.
The adaptive user interface shows how much a misaligned machine requires to be adjusted by adding or removing shims at the machine’s feet. When proceeding with the measurement, you no longer need to remeasure in between the vertical and the horizontal adjustment during the adjustment process. The following horizontal adjustment is promptly carried out with real values displayed.
The time savings from the VertiZontal Moves are huge; such as e.g. much less walking around machines or climbing up and down to make adjustments and re-measure and/or fewer times shimming, hammering, prying, lifting, sweating, etc.
Sensor Technology
All Fixturlaser shaft alignment tools use two sensor units, i.e. two laser beams. With the integrated innovative technologies, 30 mm CCD sensors and line laser, we have virtuallyeliminated both rough alignment and laser adjustment, even for big angular misalignments.
This is a benefit you would not enjoy with the measurement technique that uses only one laser beam. With such a technique, you would have to remeasure after each and every adjustment. Not to mention all the working hours you will save!
The dual high performance inclinometers in the sensor units have the highest angle accuracy of the units in each measurement position in the market. The Fixturlaser GO Pro will give you the best possible measurement results, which will result in prolongedmachine life time.
Our sensor units have instant battery check, i.e. no need to waste time on starting up the entire system in order to check the battery’s power status!
Pick Your View with the Screen Flip
Confusing when the display screen does not show the machine from the same angle as your view of it? No problem, we have a solution for that as well – the Screen Flip. It enables you to see the machine set-up from the actual view point that you have of the machine.
No Time Wasted
No time wasted equals in the life of a maintenance professional a product like the Fixturlaser GO Pro. We all know how expensive unplanned downtime is, as well as how much you spend on machine component wear. Here we give you several examples of how the Fixturlaser GO Pro saves your time and, hence, your money:
- If you are short of time, you will find the Machine Defined Data function very useful. By preloading all relevant parameters (distances, target values, and tolerances) for a specific machine, you will have all data for the machine readily available in your Fixturlaser GO Pro alignment tool!
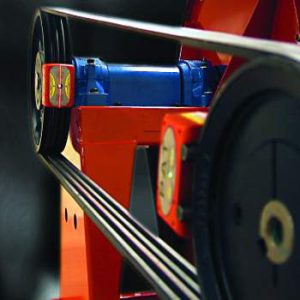
- We have pre-assembled all parts in the case (see the picture above of the sensor unit and the shaft bracket); hence the system is ready for mounting and usage on the machine the moment you open the case!
- Best in market with a 17 hours battery time (continuous measuring), which means that your work will not be interrupted due to battery flatness and constant recharging, a situation that would prolong the machine downtime.
- And we are topping that off with an integrated in case charging of the sensor units; all for the convenience and speed in your life as a maintenance professional!
Technical Data
Technical Specification
| Fixturlaser GO Pro | |
| Case | |
| Weight including all standard parts: | 5,1 kg (11,2 lbs) |
| Dimension: | 415 mm x 325 mm x 180 mm (16 in x 13 in x 7 in) |
| Display Unit | |
| Weight: | 0,62 kg (1,37 lbs) with batteries |
| Dimensions: | 205 mm x 116 mm x 56 mm (8,1 in x 4,6 in x 2,2 in) |
| Environmental protection: | IP 54 |
| Display size: | 4” (102 mm) diagonal (84 x 56 mm) |
| Operating time: | 30 hours typical use |
| Sensor Units | |
| Weight: |
M4: 200 g (7,1 oz) with battery S4: 188 g (6,6 oz) with battery |
| Dimensions: | 86 mm x 77 mm x 33 mm (3,4 in x 3,0 in x 1,3 in) |
| Environmental protection: | IP 65 (dust tight and protected against water jets) |
| Measurement distance: | Up to 5 m |
| Detector: | 2nd generation digital sensor |
| Detector length: | 30 mm (1,2 in) |
| Detector resolution: | 1 µm |
| Measurement accuracy: | 0,3% ± 7 µm |
| Operating time: | 17 hours continuous use (measuring) |
| Battery charging time (system off, room temperature): | 8 hours |
| Laser safety: | |
| Shaft brackets | |
| Shaft diameter: |
Ø 25-175 mm (1 in – 6.9 in) With extension chains: Ø 25-450 mm (1 in -18 in) |
| Rods: | 4 pcs 150 mm (5,9 in) |


